As the temperature rises, installing an air conditioning (AC) unit becomes a necessity for maintaining a comfortable indoor environment. While hiring a professional is an option, installing an AC unit yourself can be a rewarding DIY project. This article provides a comprehensive, step-by-step guide on air conditioning installation, ensuring that you can beat the heat with ease.
Selecting the optimal location for your AC unit is crucial for efficient cooling. Look for a spot that receives good airflow and is free from obstructions. The unit should also be close to an electrical outlet for power supply. Ideally, the outdoor unit should be placed on a flat, stable surface, away from direct sunlight and excessive debris.
AC Unit: Ensure you have the AC unit ready for installation. This includes unboxing it and making it accessible in the installation location.
Mounting Brackets: Check that you have the appropriate mounting brackets for your AC unit. These brackets are essential for supporting and securing the unit to the wall.
Screws: Gather the screws needed for attaching the mounting brackets to the wall. The type and size of screws may vary depending on the wall material (e.g., concrete, wood).
Rubber Pads: If included with your AC unit, have rubber pads on hand. These are often used for vibration dampening to minimize noise and vibration from the unit.
Level: A level tool is necessary for ensuring that both the mounting brackets and the AC unit itself are installed level. A level unit is crucial for proper drainage and efficient operation.
Drill: You’ll need a drill to create holes for the screws used to attach the mounting brackets to the wall. Ensure the drill is charged or has a power source ready.
Electrical Wires: Prepare the electrical wires needed to connect the AC unit to the power source. These wires should be of the appropriate length and gauge for the installation.
Wire Connectors: Have wire connectors available for securely connecting the electrical wires. Wire connectors help ensure safe and reliable electrical connections.
Wrench: A wrench may be necessary for tightening bolts or fasteners during the installation process.
Instruction Manual: Consult the AC unit’s instruction manual for specific requirements and guidelines related to the installation. The manual will provide valuable information on installation steps, safety precautions, and any unique considerations for your particular unit.
Bracket Attachment: Using a drill and the appropriate screws, attach the mounting brackets to the wall in the designated installation location. It’s crucial to ensure that the brackets are securely fastened to the wall and positioned level.
Level Check: After attaching the brackets, use a level to double-check their alignment. This step is essential to ensure that the AC unit, when mounted, will be level. A level unit allows for proper drainage and efficient operation.
Position rubber pads on top of the brackets. These pads serve to absorb vibrations and reduce noise generated by the AC unit during operation. Place the AC unit on the rubber pads, ensuring it sits securely on the brackets.
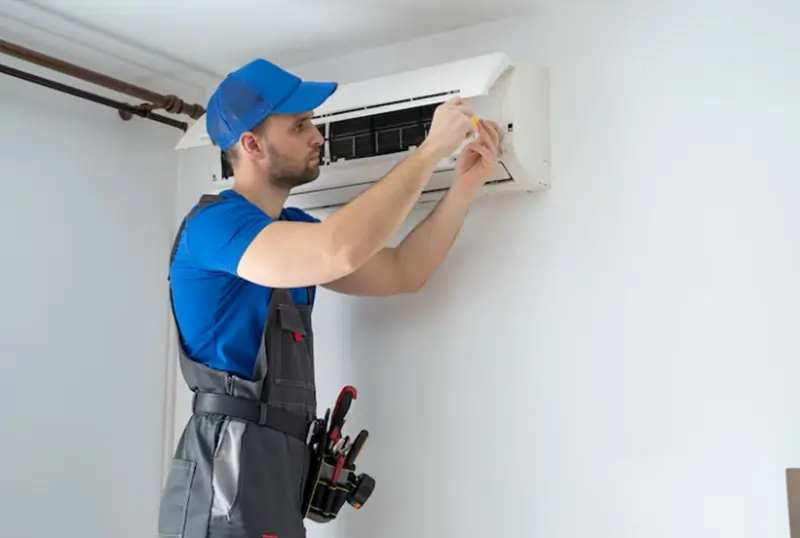
Consult the AC unit’s manual for the correct electrical wiring instructions. Turn off the power to the electrical outlet before working on the wiring. Carefully follow the manufacturer’s guidelines to connect the wires and use wire connectors to ensure a secure connection. It’s essential to adhere to proper safety precautions when working with electrical components.
Mounting Brackets: Once you have positioned the AC unit on the mounting brackets, secure it in place using the provided screws. Mounting brackets are essential for supporting the weight of the unit and preventing it from shifting or falling. Properly installed brackets ensure the safety and stability of the AC unit.
Leveling: Ensure that the AC unit is level. A level unit is essential for proper drainage and efficient operation. Use a level tool to check that the unit is not tilted or slanted in any direction. Adjust the mounting brackets as needed to achieve a level position.
Secure Connections: Double-check all connections, including electrical and refrigerant lines, to make sure they are secure. Loose connections can lead to inefficiency, leaks, and even damage to the unit. Ensure that all fasteners, bolts, and screws are tightened appropriately.
Power On: Before sealing the installation, it’s crucial to test the AC unit to ensure it’s functioning correctly. Turn on the power to the unit and set it to the desired temperature using the thermostat or remote control.
Observations: While the AC unit is running, pay attention to several key factors:
Sound: Listen for any unusual or excessive noises coming from the unit. Unusual sounds can be indicative of issues that may require further attention or adjustments.
Cooling Performance: Check whether the AC unit effectively cools the room to the desired temperature. Assess how quickly it reaches the set temperature and maintains it.
Leaks and Issues: Inspect the area around and beneath the unit for any signs of leaks or issues. Any unexpected moisture or water accumulation should be addressed promptly.
Runtime: Allow the AC unit to run for a while during the test. This ensures that it operates consistently and effectively. Monitor its performance to confirm that it meets your cooling needs.
Testing the AC unit is a critical step to verify that the installation was successful and that the unit is operating as expected. Identifying and addressing any issues during this testing phase can prevent future problems and ensure optimal performance and efficiency. If you notice any abnormalities during testing, it’s advisable to consult with a professional technician for further evaluation and adjustments if necessary.
Sealing Gaps: After installing the AC unit, it’s essential to seal any gaps or openings around the unit with weatherproof sealant. These gaps can allow warm air from outside to infiltrate your living space, which can diminish the cooling efficiency of the system. By sealing these gaps, you create a tight seal, ensuring that the cool air generated by the AC stays indoors.
Insulating Refrigerant Lines: The refrigerant lines that connect the outdoor unit (condenser) to the indoor unit (evaporator coil) should be insulated. Insulation is crucial for optimizing cooling efficiency and preventing condensation buildup on the lines. Condensation can not only reduce efficiency but also potentially lead to water damage and corrosion over time. Proper insulation helps maintain consistent cooling performance.
Line Security: It’s essential to secure the refrigerant lines properly. This involves attaching them securely to both the AC unit and the indoor air handler or evaporator coil. You can use zip ties, adhesive clips, or specialized brackets designed for this purpose. Properly securing the lines prevents them from shifting or vibrating, which can lead to wear and tear over time.
Organized and Protected Lines: Neatly organizing and protecting the refrigerant lines ensures their longevity and efficient performance. Well-secured lines also minimize the risk of accidental damage and keep the installation looking tidy and professional.
Air Filter Maintenance: One of the most crucial aspects of regular maintenance is cleaning or replacing air filters. Dirty or clogged filters can restrict airflow, making your AC system work harder and less efficiently. Check the manufacturer’s recommendations for how often to replace or clean filters and follow that schedule.
Refrigerant Levels: Periodically check the refrigerant levels in your AC system. Low refrigerant levels can indicate a leak, which should be addressed promptly by a professional technician to ensure optimal cooling performance.
Evaporator and Condenser Coil Cleaning: Cleaning the evaporator and condenser coils is essential for maintaining efficiency. Dust and debris can accumulate on these coils over time, reducing their ability to transfer heat effectively. Regular cleaning, usually performed annually, helps the AC unit run efficiently and extends its lifespan.
Related: How To Choose The Best AC Company In India?
Installing an AC unit can be a rewarding DIY endeavor, allowing you to take control of your indoor comfort. By following this step-by-step guide, you can confidently install your AC unit while maintaining safety and efficiency. Remember that if you’re unsure about any aspect of the installation process, it’s always a good idea to seek professional assistance. With your new AC unit in place, you’ll be ready to enjoy cool, comfortable living spaces even on the hottest days.
This is the definitive guide for every dog owner looking to improve their dog's life… Read More
In today's fast-paced and ever-changing world, children are facing more mental health challenges than ever… Read More
Star Wars Day brings joy to adults and children alike. There is no activity our… Read More
Enter the universe of Squid Game IO, where there are piles of stakes and a… Read More
Over the recent years, social media marketing has transformed from an advertising instrument into a… Read More
When it comes to determining parentage using DNA tests, it's crucial to select the right… Read More