7 Surprisingly Easy Crafts for Middle Schoolers They’ll Actually Want to Make
Finding crafts for middle schoolers that aren’t “too babyish” or overly complicated can feel impossible. Tweens outgrow simple projects quickly, yet many advanced crafts frustrate them just as fast.
Crafting during these years does more than fill time—it helps kids build patience, problem-solving skills, and fine motor control. The ideas in this list understand what middle schoolers actually enjoy. They strike a balance between guided creativity and achievable results, offering projects tweens will proudly display or use.
Let’s explore seven surprisingly simple crafts that even your “too cool” middle schooler will want to make.
1. Punchora Punch Needling Kits
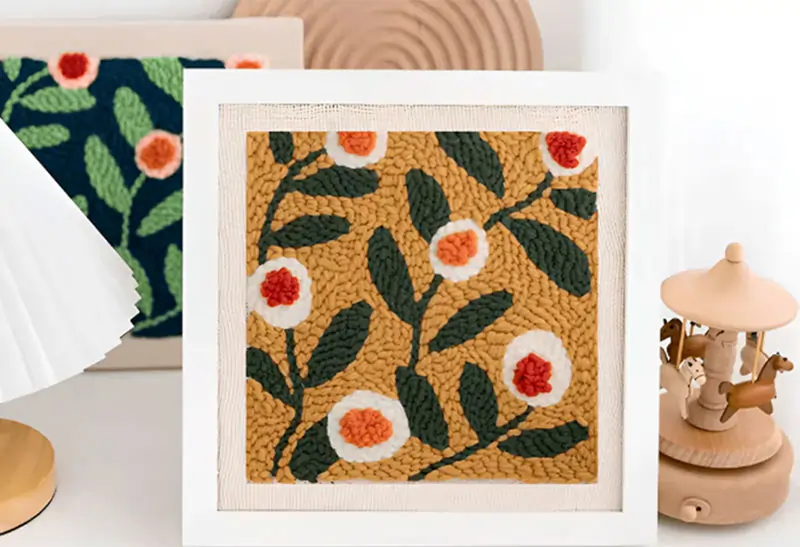
Punch needle embroidery has become one of the easiest textile arts to learn. Middle schoolers can express their creativity without getting frustrated. Punchora’s kits give kids a great starting point into this rewarding craft.
These kits let you turn simple fibers into textured art pieces – they work just like “textile coloring books.” Kids use a special tool to punch yarn loops through pre-printed fabric. This creates plush, touchable designs that middle schoolers can show off proudly.
Punchora Punch Needling Kits overview
These kits work so well for tweens and young teens because they mix just the right amount of guidance with creative freedom. Each Punchora kit comes ready to use with:
- Punch needle tool to create fabric loops
- Yarn threader that makes setup easy
- Pre-measured, quality yarn in the right colors
- Pre-printed fabric with design guides
- Frame or hoop to keep fabric tight
- Clear step-by-step instructions
The craft itself fits perfectly with what middle schoolers can do and enjoy. Unlike crafts that need intense focus or exact measurements, punch needling lets kids relax. Small mistakes blend right into the design’s texture.
Making something beautiful takes just three simple steps. You start by unpacking the kit and threading the needle. Then you put the pre-printed canvas in its frame and punch along the design lines to create textured loops. Your finished piece is ready to display or give away.
Middle school crafters love these kits for several reasons:
- Projects finish quickly compared to other textile arts
- No need to count patterns or learn hard techniques
- Kids can relax and de-stress after school
- They create real decorations worth keeping
Punchora makes their kits so anyone can use them – even complete beginners end up with amazing results. Pre-printed designs take away the guesswork but still let kids add their own style by changing how tight or tall they make the loops.
Kids can pick from designs with animals, flowers, or geometric patterns. The “Forest Nap” and “Fragrant Trio” collections look grown-up enough that tweens won’t feel like they’re making baby crafts.
Punch needling gives kids a break from screens and digital activities. Watching yarn become textured artwork brings satisfaction that digital activities can’t match.
Parents will appreciate how tidy this craft stays. Once the hoop is set up, materials stay in place better than with painting or paper crafts. Punchora’s high-quality materials keep the fabric tight for smooth stitching, and the yarn stays strong throughout the project.
2. DIY Embroidery Hoop Art
Punch needle embroidery has become one of the easiest textile arts to learn. Middle schoolers can express their creativity without getting frustrated. Punchora’s kits give kids a great starting point into this rewarding craft.
These kits let you turn simple fibers into textured art pieces – they work just like “textile coloring books.” Kids use a special tool to punch yarn loops through pre-printed fabric. This creates plush, touchable designs that middle schoolers can show off proudly.
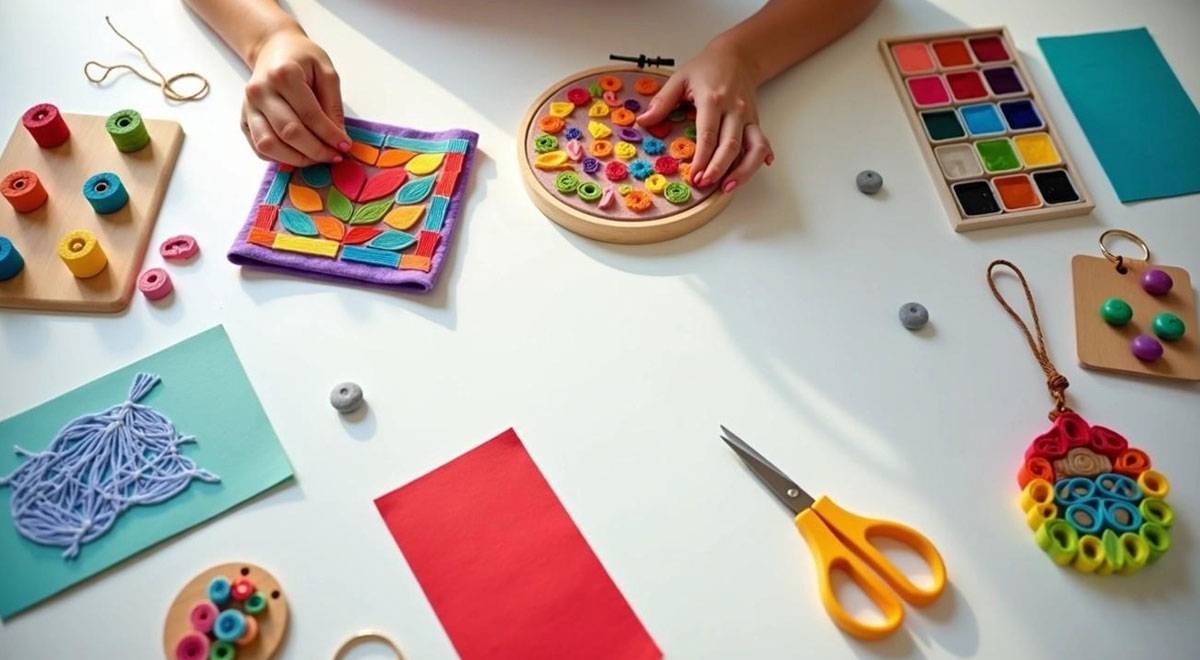
DIY Embroidery Hoop Art overview
Middle schoolers find embroidery hoop art both calming and rewarding as a creative outlet. Modern embroidery hoop art projects are available without learning countless stitches, unlike traditional hand embroidery. Students can see impressive results right away.
These projects work great for tweens because they’re so versatile. Many craft projects end up in a drawer somewhere, but embroidery hoop creations become wall art that middle schoolers love to display in their rooms. These projects need minimal setup and cleanup, which makes them perfect for busy families.
You’ll need just a few simple supplies to start an embroidery hoop project:
- Embroidery hoops (vintage ones have sturdier frames and smoother hardware)
- Fabric (white tea towels work well as a base)
- Felt in various colors
- Embroidery floss in assorted colors
- Plastic needles (safer for beginners)
- Scissors
- Watercolor paints (optional for background designs)
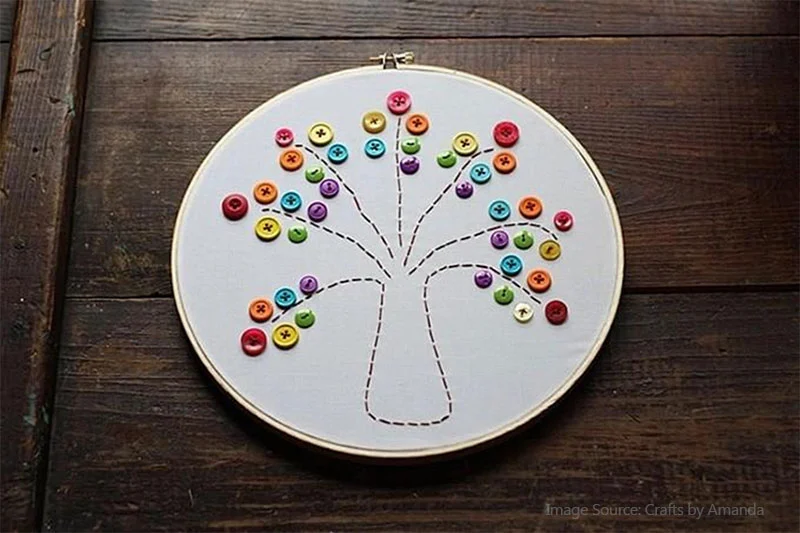
The sort of thing I love about embroidery hoop art is how it’s grown beyond traditional stitching. Middle schoolers can create stunning designs without becoming skilled at complex embroidery techniques. To cite an instance, see how appliqué works – students arrange pre-cut felt shapes on fabric and secure them with simple stitches. Even beginners can create professional-looking designs this way.
Most middle schoolers can handle the process on their own. They start by stretching fabric tightly in the hoop. Next, they either sketch a design right onto the fabric or arrange pre-cut felt pieces into their desired pattern. Simple stitches secure everything in place and add decorative details.
Middle schoolers especially enjoy painting burlap fabric with watercolors before adding simple stitching and beads. This creates a unique textured effect that brings together multiple craft elements. Rooms become “quiet with concentration as they practice moving the needle up and down through the burlap”.
This craft adapts well to different skill levels, which is another great feature. Students can start with pre-designed patterns while exploring their creativity through color choices and stitch variations. As their confidence grows, they can try more complex designs or add buttons and beads.
3. Beginner Paper Quilling Designs
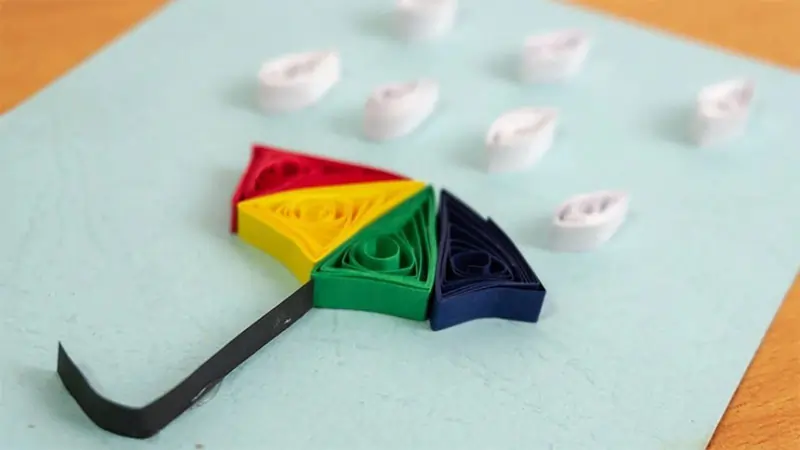
Paper quilling has evolved from its 15th-century origins into a perfect modern craft. Middle schoolers can express their creativity without getting frustrated. This art involves rolling, shaping, and gluing thin strips of paper that create intricate designs students can display proudly.
Beginner Paper Quilling Designs overview
Tweens love paper quilling because it’s so accessible. You need just a few simple supplies to create impressive results:
- Paper strips (approximately 1/8″ to 1/2″ wide)
- A slotted quilling tool or even a chopstick
- Glue (like Elmer’s)
- Cardstock or mounting board
- Scissors
Paper quilling stands out among crafts because we developed it to enhance fine motor skills while offering a relaxed, stress-relieving activity. Students find peace in rolling and shaping paper, making it a great way to unwind after school. One middle schooler called it “relaxing and destressing” after finishing her first project.
Starting with simple shapes comes naturally and keeps students engaged. Students begin by creating a tight roll – they fold one end of the paper strip and roll it completely. The paper forms a spiral when released. This spiral becomes the foundation for many other shapes through easy changes: pinch one end of a loose circle for a teardrop, pinch two sides for eye shapes, or create squares by pinching four sides.
New quillers can start with simple projects like quilled apples. These need just cardstock cut into strips, a makeshift tool like a chopstick, and glue. These projects help middle schoolers succeed quickly and boost their confidence. A parent shared how her daughter “loved making the different shapes of quills and putting it all together”.
Paper quilling strikes the right balance between structure and creativity. Middle schoolers can follow simple techniques while expressing themselves through color choices and design arrangements. This balance makes it perfect for middle schoolers who might find other activities too childish or complex.
The craft grows with the student’s skills. As their confidence builds, they can try complex designs or add elements like pearl centers or metallic paper. Kids who start with simple cards often progress to creating framed artwork.
4. Simple String Art Boards
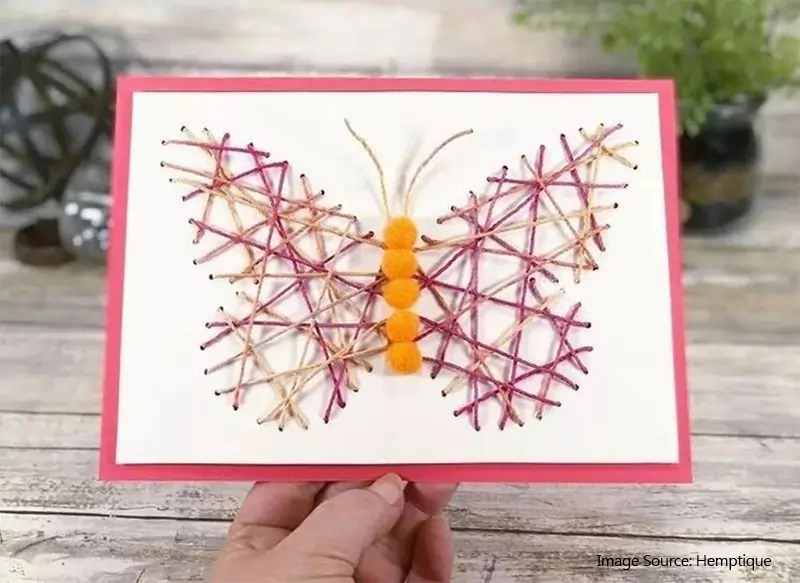
String art gives middle schoolers a hands-on craft experience that combines construction and design. This beginner-friendly project turns simple materials into striking geometric patterns that tweens can display in their rooms with pride.
String art lets middle schoolers use real tools while creating something visually impressive, unlike more delicate crafts. Kids hammer small nails into a wooden base, then wrap colorful thread or yarn around them to create intricate patterns. The tactile experience of hammering nails and weaving string provides a refreshing break from screen-based activities that fill tween life.
Simple String Art Boards overview
You’ll need these simple supplies to start:
- A wooden board (5-6″ squares work well for beginners)
- Small nails (about 1″ long with small heads)
- Hammer (kids’ hammers are great for smaller hands)
- Colorful embroidery floss or yarn
- Pencil and template of your design
This age group loves string art because it’s so straightforward. Start by tracing a simple shape onto your wooden base – letters, hearts, or geometric patterns work great for beginners. Next, hammer nails along your design’s outline about ½-inch apart. Your final artwork will look more detailed when you place the nails closer together. Last, weave your string or embroidery floss around the nails in different patterns to create striking visual effects easily.
Middle schoolers can try various stringing techniques as they create. Some kids prefer neat patterns, while others like a more random approach. A parent noticed that the process became more therapeutic when their child stopped overthinking the pattern.
Finished string art pieces become impressive decorations that tweens actually want to display. These projects “transform into unique string art pieces” that middle schoolers showcase proudly in their rooms. Kids can stand their finished work on bookshelves or hang it on walls as practical decorative items.
Cardboard versions offer a safer alternative for younger middle schoolers who might not be ready for hammers and nails. Kids can cut notches in cardboard edges instead of using nails to create similar designs. This change keeps the creative aspects while making the project safer.
5. Watercolor Layering Cards
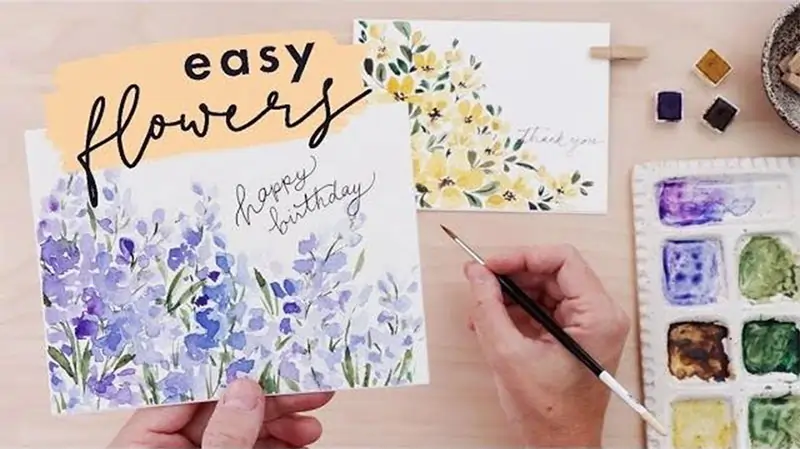
Watercolor stands out as the perfect way to introduce color theory to middle schoolers. These paints’ transparent nature opens up amazing possibilities through a technique called layering or glazing.
Glazing lets you paint see-through layers of color on top of dried watercolor. The colors blend together naturally because each layer stays transparent. You don’t need to mix paints beforehand. This creates rich, dimensional effects that captivate tweens who are starting to explore color relationships.
Watercolor Layering Cards overview
You’ll need these simple supplies:
- Watercolor paper cards (or watercolor paper cut to fit blank cards)
- Student-grade watercolor paints
- Round watercolor brushes (sizes 3-6)
- Two cups of clean water
- Paper towels for blotting
- Optional: waterproof fine-liner pens
Middle schoolers love watercolor layering cards because mistakes don’t matter much. Students don’t need exact measurements or complex techniques. The process welcomes unexpected color combinations and happy accidents. A student can complete a card in under 30 minutes and feel proud of their work.
Students should start with a color chart that shows how primary colors overlap. Blue layered with yellow creates green, red with blue makes purple, and yellow with red produces orange. This builds their confidence before they tackle actual cards.
The process has three simple steps:
- Paint the first light wash of color and let it dry completely
- Add a second layer of a different color over specific areas
- Continue adding layers to deepen colors and create shadows
Each layer needs to dry before adding the next one. This is a vital step. Students who rush might end up with mixed colors instead of distinct layers.
The layering technique creates amazing greeting cards with depth that single colors can’t match. Students enjoy making birthday cards with layered balloons or seasonal cards with layered landscapes.
Simple shapes like circles or stripes work best for beginners. Students can create overlapping circles using primary colors and watch secondary colors appear at the intersections. They can also layer complementary colors, like blue over orange, to add rich shadows that give their designs more depth.
6. Felt Bookmark Making
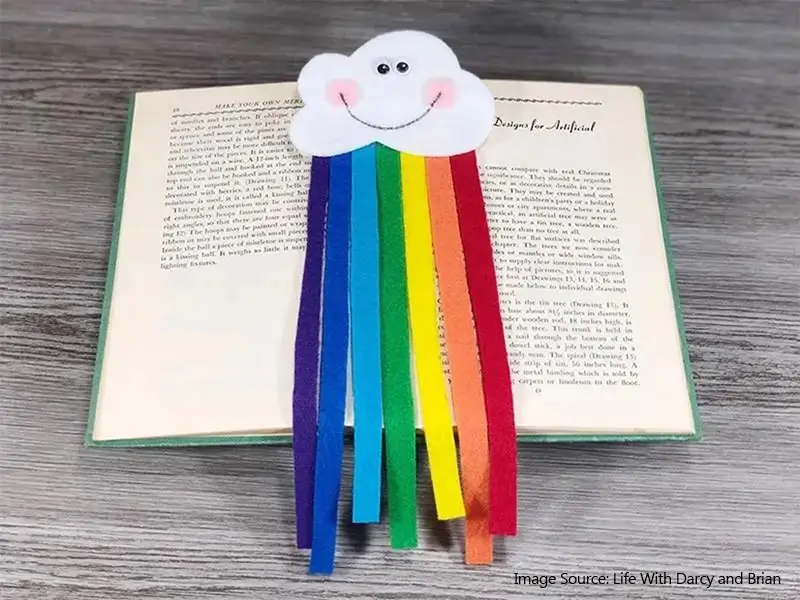
Middle schoolers will love making felt bookmarks. These fun markers add color to reading time and help develop hand skills. The best part? They’ll actually use what they create.
Felt Bookmark Making overview
You probably have most of the materials at home already:
- Felt sheets in various colors
- Scissors
- Embroidery thread
- Embroidery needles
- Optional decorations (googly eyes, pom-poms, ribbons)
- Fabric glue or hot glue gun (with adult supervision)
Felt bookmarks stand out from other crafts because kids can make them in many different ways. Students can pick their style based on what they like and how skilled they are. Corner bookmarks that slip onto the page are a hit with tweens. Kids also love making animal-themed designs where cats, dogs, sloths, or narwhals peek out from the pages.
Middle school crafters can follow simple steps to create these bookmarks. A corner bookmark starts with a felt square cut diagonally into two triangles. The next step uses a blanket stitch to join the shortest sides, which creates a pocket for the book page. Animal bookmarks need circular shapes for faces, with added features like ears or horns, plus ribbons that hang from the book.
Kids can really make these bookmarks their own. They might add their initials, create designs from their favorite books, or decorate with sequins or beads. Tweens love this chance to show who they are through their creations.
7. Easy Beaded Keychains
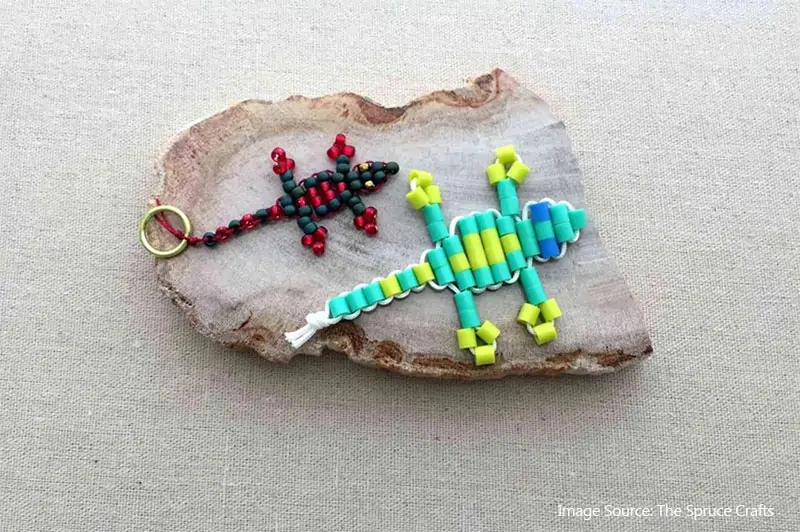
Beaded keychains strike a perfect balance between simplicity and creativity. Middle schoolers love them because these projects are practical and fun. These colorful accessories serve a daily purpose and let kids show off their personal style.
Easy Beaded Keychains overview
You only need a few affordable materials to get started:
- Keychain rings (a 10-pack costs approximately $4-$5)
- Colorful beads (wooden, silicone, or plastic)
- Strong cord or lanyard
- Scissors
Kids love this craft because it’s quick and versatile. A finished keychain takes less than 15 minutes, and the design possibilities seem endless. Students can paint wooden beads in custom colors or use spray paint to create unique effects. Silicone beads (typically 12-15mm) work great for kids who want to improve their fine motor skills.
The creative process is simple enough for younger middle schoolers to handle on their own. Cut a piece of cord to the length you want. Thread beads in your chosen pattern. Attach the beaded strand to the keychain ring. You can add fun touches like yarn tassels at the end.
Beaded keychains help kids develop skills while having fun. Students improve their fine motor coordination when they work with small beads and threading materials. The design process lets them think creatively about patterns and colors.
Middle schoolers often shy away from “childish” crafts, but these keychains are different. They can attach them to backpacks, house keys, or use them as bag charms. Kids actually want to keep and use what they make.
Comparison Table
| Craft Project | Materials Required | Completion Time | Skill Level | Main Benefits | Key Features |
| Punchora Punch Needling Kits | Punch needle tool, yarn threader, pre-measured yarn, pre-printed fabric, frame/hoop | Faster than other textile arts | Beginner-friendly | Builds patience, reduces stress, provides instant satisfaction | Pre-printed designs, contained mess, creates display-worthy items |
| DIY Embroidery Hoop Art | Embroidery hoops, fabric, felt, embroidery floss, plastic needles, scissors | Under 1 hour for simple designs | Beginner to intermediate | Soothes mind, enhances fine motor skills | Creates instant wall art, minimal setup/cleanup, suits various skill levels |
| Beginner Paper Quilling Designs | Paper strips, quilling tool/chopstick, glue, cardstock, scissors | Not mentioned | Beginner-friendly | Enhances fine motor skills, reduces stress | Requires minimal materials, adjustable difficulty, produces beautiful art |
| Simple String Art Boards | Wooden board, small nails, hammer, colorful thread/yarn, templates | Not mentioned | Beginner to intermediate | Improves hand-eye coordination, spatial reasoning | Creates 3D effects, hands-on experience, produces attractive wall art |
| Watercolor Layering Cards | Watercolor paper cards, paints, brushes, water cups, paper towels | Under 30 minutes | Beginner-friendly | Builds color theory knowledge, strengthens patience | Allows mistakes, creates depth effects, useful as cards |
| Felt Bookmark Making | Felt sheets, scissors, embroidery thread/needles, decorative items, glue | 15-20 minutes | Beginner-friendly | Teaches sewing basics, improves pattern recognition | Practical use, customizable design, perfect for gifts |
| Easy Beaded Keychains | Keychain rings, beads, cord/lanyard, scissors | Under 15 minutes | Beginner-friendly | Improves fine motor skills, sparks creativity | Daily practical use, customizable design, portable craft |
Conclusion
These seven crafts make it easy to find creative projects that respect middle schoolers’ growing tastes while staying approachable for beginners. Each activity blends guidance with freedom, giving tweens space to personalize their work and feel proud of what they create.
The crafts don’t just look good—they’re functional too. A punch needle piece becomes room décor, a bookmark gets used daily, and handmade keychains give backpacks a personal touch. Along the way, kids develop fine motor skills, patience, spatial reasoning, and creative confidence.
You don’t need expensive materials or complex tools to spark their interest. Choose a craft from this list and watch your tween shift from eye-rolling to focused creativity as they make something genuinely cool and worth keeping.